
Sun Tile CorporationDiscuss your project
CENTRAL TEXAS / EST. 1984

Your build.
Our craft.

Tile, wood, vinyl, and carpet installation for Central Texas builders. Experienced crews, project management, and service support from a family-owned company.

Tyler Shelton
Tyler Shelton

Owner & President
Family-owned since 1984

BEHIND THE FINISHEXPLORE THE ASSEMBLY
04030201SURFACE / BOND / SYSTEM / SUBSTRATEZ
The finish

An intentional finish.

Format, joint alignment, transitions. Bring the finish intent into the layout conversation before installation begins.

A DETAIL TO RESOLVEWhat needs to align at doorways and adjoining finishes?

Conceptual assembly. Final details depend on the selected products and site conditions. Read the assembly notes ↗

CRAFTSMANSHIP / COORDINATION / FOLLOW-THROUGH.SCROLL TO EXPLORE AUSTIN + CENTRAL TEXAS
01 A CLOSER LOOK AT THE WORK

Good workmanship
rewards a closer look.

Explore three finished spaces from Sun Tile’s project photography. Select a room, inspect its details, and see the decisions behind a considered finish.

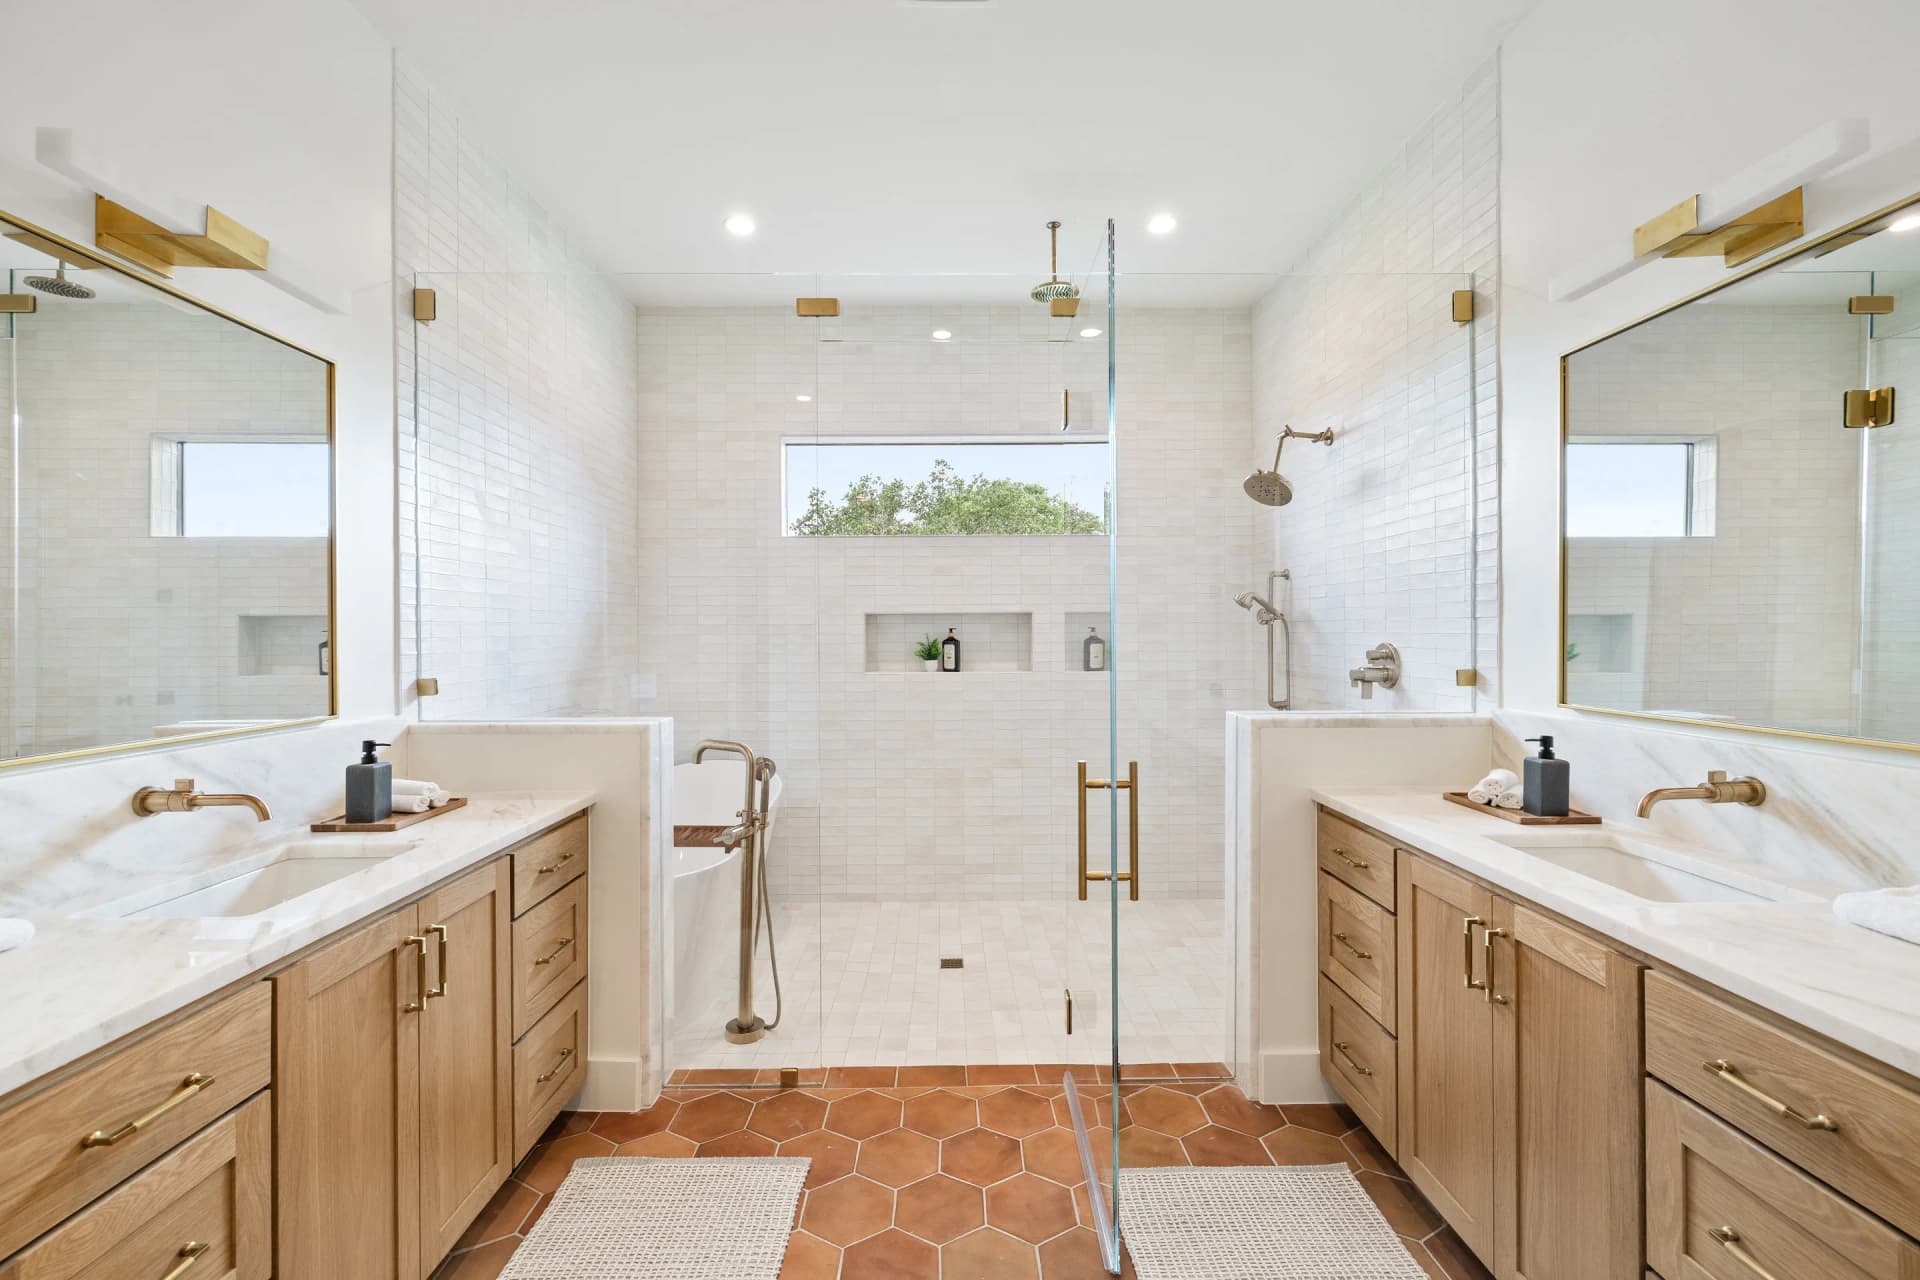
Sun Tile project photography: tiled bathroom with a recessed niche and a border between two floor finishes
Loading project photograph…
SUN TILE / BATH & SHOWER
Closer view of bath & shower: the field DETAIL / 01
2.6×

The eye follows the joint.

Follow the horizontal courses across the wall. Repetition makes the overall layout—and any interruption—easy to read.

WHY IT MATTERS TO YOUR BUILD

A composed finish, from the doorway to the far wall.

Resolve the starting point and the cuts around fixed features before the layout is approved.

Have a detail you want to get right? Tell us about the space and the finish you have in mind.

Discuss your finish details
THE TEAM BEHIND THE FINISH

Workmanship matters.
So does follow-through.

A flooring partner becomes part of your build. The scope, the coordination, and the final details deserve the same attention as the finished surface.

01BIDDING & MATERIAL SELECTION

A clear scope

Material, preparation, layout, and site access all shape the work. Discuss those items together so the project can be priced for its actual requirements.

FOR YOUR PROJECT

Start with the plans, finish selections, and known site conditions.

02PROJECT MANAGEMENT

A coordinated installation

Sun Tile’s project managers and installation crews support the work on site. Bring the release sequence, access requirements, and adjacent trades into the scheduling conversation.

FOR YOUR PROJECT

Clarify the point of contact and coordination needs for your project.

03SERVICE & PUNCH-OUT TEAM

Support for the final details

Sun Tile has a dedicated service and punch-out team. Discuss walkthrough items and follow-up needs with a company that has a team for that part of the work.

FOR YOUR PROJECT

Agree on the closeout items and how follow-up will be handled.

Production communities · Custom homes · Commercial projectsHow we work with builders
Sun Tile founder Bill Shelton, left, with his son Tyler Shelton, Owner and President
BILL SHELTON · FOUNDERTYLER SHELTON · OWNER & PRESIDENT
A FAMILY NAME. A LOCAL BUSINESS.

Experience has
a human side.

Bill Shelton founded Sun Tile in 1984. His son Tyler leads the company today. From our home in Buda, we serve the builders and communities of Austin and Central Texas.

1984Family-owned since
75,000+Flooring installations across
Austin and Central Texas
168 Park 35 Cove S · Buda, Texas(737) 704-3000
04 THE LAYOUT STUDIO

Resolve the layout.
Then commit to it.

An attractive field can still leave difficult perimeter cuts. Compare two starting points, inspect the smallest edge piece, and bring a considered concept to the project discussion.

MAKE THE STUDY USEFUL

Explore it. Keep it. Bring it to the conversation.

Save a drawing or share the exact settings with your project team.

SVG export includes measurements and concept limits. Shared links contain only the study settings.

Explore your room.

Change a detail. See its effect.

Try an example room

Example dimensions; keep your tile selections.

Your room dimensions
Width
Length

1–50 ft per side, in whole inches. Inches run from 0 to 11.

Drawing: 12 × 10 ft. Update to apply your entries.

12 × 24 in0° orientationFormats shown to scale

Nominal study sizes. Confirm the actual product and application.

⅛″ENLARGED JOINT DETAIL

Grout fills this gap. It is included in the layout and cut calculations. Confirm the joint width for your selected tile.

Pattern
Center the reference on

⅛″ grout joint • nominal tile sizes
Rectangular room • concept study

PLAN VIEW / STACKED / / ⅛″ JOINT
Perimeter cut: 11.63 × 5.38 inchesPerimeter cut: 24.00 × 5.38 inchesPerimeter cut: 24.00 × 5.38 inchesPerimeter cut: 24.00 × 5.38 inchesPerimeter cut: 24.00 × 5.38 inchesPerimeter cut: 24.00 × 5.38 inchesPerimeter cut: 11.63 × 5.38 inchesPerimeter cut: 11.63 × 12.00 inchesFull tile: 24.00 × 12.00 inchesFull tile: 24.00 × 12.00 inchesFull tile: 24.00 × 12.00 inchesFull tile: 24.00 × 12.00 inchesFull tile: 24.00 × 12.00 inchesPerimeter cut: 11.63 × 12.00 inchesPerimeter cut: 11.63 × 12.00 inchesFull tile: 24.00 × 12.00 inchesFull tile: 24.00 × 12.00 inchesFull tile: 24.00 × 12.00 inchesFull tile: 24.00 × 12.00 inchesFull tile: 24.00 × 12.00 inchesPerimeter cut: 11.63 × 12.00 inchesPerimeter cut: 11.63 × 12.00 inchesFull tile: 24.00 × 12.00 inchesFull tile: 24.00 × 12.00 inchesFull tile: 24.00 × 12.00 inchesFull tile: 24.00 × 12.00 inchesFull tile: 24.00 × 12.00 inchesPerimeter cut: 11.63 × 12.00 inchesPerimeter cut: 11.63 × 12.00 inchesFull tile: 24.00 × 12.00 inchesFull tile: 24.00 × 12.00 inchesFull tile: 24.00 × 12.00 inchesFull tile: 24.00 × 12.00 inchesFull tile: 24.00 × 12.00 inchesPerimeter cut: 11.63 × 12.00 inchesPerimeter cut: 11.63 × 12.00 inchesFull tile: 24.00 × 12.00 inchesFull tile: 24.00 × 12.00 inchesFull tile: 24.00 × 12.00 inchesFull tile: 24.00 × 12.00 inchesFull tile: 24.00 × 12.00 inchesPerimeter cut: 11.63 × 12.00 inchesPerimeter cut: 11.63 × 12.00 inchesFull tile: 24.00 × 12.00 inchesFull tile: 24.00 × 12.00 inchesFull tile: 24.00 × 12.00 inchesFull tile: 24.00 × 12.00 inchesFull tile: 24.00 × 12.00 inchesPerimeter cut: 11.63 × 12.00 inchesPerimeter cut: 11.63 × 12.00 inchesFull tile: 24.00 × 12.00 inchesFull tile: 24.00 × 12.00 inchesFull tile: 24.00 × 12.00 inchesFull tile: 24.00 × 12.00 inchesFull tile: 24.00 × 12.00 inchesPerimeter cut: 11.63 × 12.00 inchesPerimeter cut: 11.63 × 12.00 inchesFull tile: 24.00 × 12.00 inchesFull tile: 24.00 × 12.00 inchesFull tile: 24.00 × 12.00 inchesFull tile: 24.00 × 12.00 inchesFull tile: 24.00 × 12.00 inchesPerimeter cut: 11.63 × 12.00 inchesPerimeter cut: 11.63 × 12.00 inchesFull tile: 24.00 × 12.00 inchesFull tile: 24.00 × 12.00 inchesFull tile: 24.00 × 12.00 inchesFull tile: 24.00 × 12.00 inchesFull tile: 24.00 × 12.00 inchesPerimeter cut: 11.63 × 12.00 inchesPerimeter cut: 11.63 × 5.38 inchesPerimeter cut: 24.00 × 5.38 inchesPerimeter cut: 24.00 × 5.38 inchesPerimeter cut: 24.00 × 5.38 inchesPerimeter cut: 24.00 × 5.38 inchesPerimeter cut: 24.00 × 5.38 inchesPerimeter cut: 11.63 × 5.38 inches12′ 0″10′ 0″REFERENCE ORIGIN / TILE CENTER
Full placementPerimeter cutCenterlineOne minimum cut
11.63″5.38″
THE OUTLINED PIECE / MEASURED DETAIL

11.63″ × 5.38″

One piece with the smallest edge cut. The dashed outline shows a nominal 24 × 12 in tile in the same orientation.

Piece study · dimensions in inches
120 sfRoom area
45Full placements
32Cut pieces
5.38″Smallest edge cut
ONE ROOM. TWO STARTING POINTS.

See the decision side by side.

Same room, format, and scale. Select either plan to inspect its details and include it in your inquiry.

Perimeter cuts One minimum cut outlined Full placements

Joint-centering adds 6.06″ to the smallest edge cut.

Joint-centered has 4 fewer perimeter cut pieces in this room.

A wider edge piece is one consideration. Review doorways, focal points, transitions, and manufacturer pattern requirements before choosing the final layout. Cut-piece counts do not measure saw cuts, material waste, or labor.

Selected for your inquiry: Tile-centered

Review this layout with Sun Tile
What these numbers mean

Geometry, not a takeoff or installation sequence. Counts describe placed pieces; multiple cuts may come from one tile, and one piece may require several saw cuts. The smallest edge cut measures only a dimension clipped by the room boundary. Nominal sizes and the selected grout-joint width are used; a third offset means one-third of the tile-plus-joint module. With staggered rows, centering describes the reference row. Actual dimensions, manufacturer pattern limits, perimeter movement gaps, doorways, obstacles, breakage, and offcut reuse require project review. No waste, price, or purchase quantity is estimated.

05 BUILT AROUND YOUR BUILD

A partner for your
kind of build.

Production homes, one-of-a-kind spaces, and commercial environments each bring different coordination needs. Choose your project to see where the conversation starts.

REPEATABLE PLANS / MULTIPLE HOMES

See the whole neighborhood.

Repeated plans bring repeated decisions. Start the conversation with your plan types, finish packages, and release sequence.

BRING THESE TO THE CONVERSATION

01
Plan variations

Identify what repeats and what changes between homes.

02
Selection packages

Connect each plan to its intended materials and finishes.

03
Release sequence

Share anticipated starts and coordination requirements.

Assembly notes & technical references

The assembly explorer is an educational concept, not a depiction of a specified Sun Tile installation method. It omits thicknesses, movement details, membrane attachment layers, seams, and penetrations. A membrane may be absent or may serve a specific function; uncoupling, crack isolation, and waterproofing are not interchangeable. Grout is not the waterproofing layer. Product compatibility and site conditions govern the actual assembly.

Technical context: Schluter membrane system documentation · TCNA movement-joint considerations · TCNA tile and grout guidance. These references explain principles and do not imply a supplier relationship or certification.